
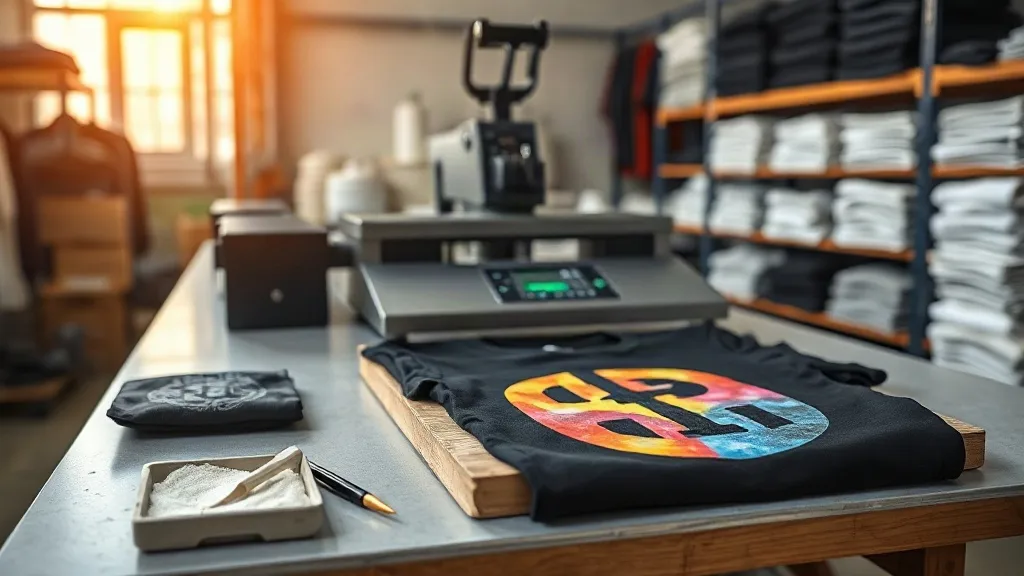
Walk into almost any small print shop these days and you will see a heat press sitting next to the vinyl cutter, usually with a stack of film sheets nearby. That stack is often dtf transfers, and the reason they have become a fixture is simple: they let a two-person operation handle full-color, multi-detail artwork on cotton, polyester, and blends without buying a screen printing setup or outsourcing every job. If you are deciding whether to add them to your service list or trying to fix problems with the ones you already sell, this guide covers the parts that actually matter day to day.
What DTF Actually Is, Without the Marketing Language
dtf stands for direct to film. The process prints your artwork in reverse onto a coated PET film using water-based pigment inks, then applies a hot-melt adhesive powder while the ink is still wet. After the powder is shaken off and the film is cured, you have a transfer that can be stored, shipped, or pressed onto fabric with a heat press. The adhesive is what bonds the ink to the garment, and the film itself is peeled away after pressing.
The practical difference between DTF and other decoration methods comes down to three things. You do not need to pretreat cotton shirts the way you would with direct-to-garment printing. You are not limited by color count the way you are with screen printing. And you can produce a single piece or a short run without the setup cost that makes screen printing uneconomical below a certain quantity. For a shop that gets a lot of one-off orders, team shirts in small sizes, and personalized gifts, that flexibility is the whole point.
Where DTF Fits and Where It Does Not
DTF handles detailed gradients, photographic images, fine text, and full-color logos well. It works on cotton, polyester, cotton-poly blends, canvas, and many synthetic fabrics. It is a strong choice for tote bags, hoodies, jerseys, and workwear.
It is not the right answer for everything. If a customer needs a soft hand feel on a lightweight tri-blend tee and is ordering 300 pieces, screen printing or DTG may serve them better. If the garment is treated with a water-repellent finish, adhesion can be inconsistent. And if someone wants a transfer applied to nylon, coated outerwear, or heavily textured fleece, test before you promise anything.
File Preparation That Saves You Rework
Most DTF problems trace back to the file, not the press. A few habits will cut your failure rate noticeably.
- Work at final print size from the start. Scaling artwork up after the fact softens edges and thins fine lines. Set your canvas to the exact finished dimensions in your design software.
- Keep small text above roughly 6 points. Below that, letters start to fill in once the powder and adhesive are involved, especially on textured fabrics.
- Check transparency handling. Semi-transparent areas and soft drop shadows can look correct on screen and print muddy. Flatten or simplify them where needed.
- Add a white underbase where it matters. On dark garments, color vibrancy depends on the white ink layer. Make sure your file includes it and that the white is not accidentally knocked out.
- Mind the margins. Leave a small border of clear film around the artwork so the powder has somewhere to sit and the edges stay clean.
Save a copy of every approved file at print size with a naming convention that includes the order number. When a customer comes back six months later for a reorder, you will not be rebuilding anything from a screenshot.
Pressing Settings and the Variables Behind Them
Every film brand publishes a recommended temperature, time, and pressure. Follow those first, then adjust. The common range sits around 150 to 165 degrees Celsius for 10 to 15 seconds on the initial press, with a second short press after peeling. Pressure matters as much as temperature: too little and the adhesive never fully engages with the fibers, too much and the design can spread or the film can wrinkle.
Peel Type Changes Your Workflow
Cold peel films require the garment to cool completely before you remove the carrier. That slows production but often produces a cleaner edge on detailed designs. Hot peel films let you remove the carrier immediately, which is faster but less forgiving if your artwork has very fine detail. Know which type you stock, because pressing a cold-peel film and peeling it warm is one of the most common causes of patchy adhesion.
Fabric and Color Considerations
Dark garments need a solid white underbase and a little more attention to press pressure. Stretch fabrics benefit from a slightly gentler press and a proper cool-down before the garment is folded or bagged. If you are pressing onto a seam, a zipper, or a pocket, use a pressing pillow so the surface stays level and the transfer does not bridge the gap.
Storing Transfers So They Still Work Next Month
Cured transfers are not indestructible. Store them flat or roll them loosely, keep them away from direct heat and sunlight, and avoid stacking heavy items on top. Humidity is the quiet enemy: film that has absorbed moisture can bubble or fail to release cleanly. A sealed bag with a desiccant pack costs almost nothing and prevents a lot of wasted stock.
Label your rolls and sheets by design name and date. In a busy shop it is easy to lose track of which film is which, and pressing the wrong design onto a customer's garment is an expensive mistake.
Pricing and Positioning for Small Shops
Customers searching for dtf transfers near me are usually comparing convenience against price. They want a local option that can turn an order around quickly, and they often do not know what the process is called. That is an opportunity: explain the method briefly, show samples, and let the quality of the finished piece do the selling.
When you price, build in the film cost, the powder, the press time, and a realistic allowance for waste. Short runs carry a higher per-unit cost, so a tiered price list that rewards quantity is fair to both sides. Many shops find that bundling design setup into the first order and charging a lower rate for reorders keeps customers coming back.
Setting Expectations With Customers
Be clear about wash care from the start: turn the garment inside out, wash cold, and skip the dryer on high heat. Tell customers that a slight texture over the print area is normal, not a defect. And be honest about which fabrics you will and will not press. A short conversation before the order prevents almost every complaint afterward.
Common Problems and Quick Fixes
- Ink cracking after washing: usually under-cured powder or too little pressure. Increase press time slightly and check that the powder was fully melted before storage.
- Patchy adhesion: uneven pressure, a wrinkled film, or a garment with a surface finish that resists bonding. Test on a scrap piece first.
- Color looking dull on dark fabric: insufficient white underbase or too thin a white layer in the file.
- Film sticking to the press: peeling at the wrong temperature for the film type, or pressing without a protective sheet.
Frequently Asked Questions
How long do DTF transfers last on a shirt?
With correct pressing and proper wash care, most transfers hold up through dozens of wash cycles. Longevity depends heavily on the fabric, the cure quality, and whether the garment is washed inside out in cold water.
Can I press DTF onto 100 percent polyester?
Yes, and it is one of the better options for polyester because the process does not rely on the fabric absorbing liquid ink. Use a slightly lower temperature and test a scrap piece first, since some poly finishes affect adhesion.
Do I need a special press for DTF transfers?
A standard heat press with adjustable temperature, timer, and pressure works fine. The key requirements are even pressure across the platen and the ability to hold a consistent temperature, not a specific brand or model.
Can I stack or layer multiple transfers on one garment?
You can, but press the largest design first and let it cool before adding the next layer. Stacking while the first transfer is still hot can distort the adhesive and cause the layers to shift.
How should I store unused transfers?
Keep them flat or loosely rolled in a cool, dry place away from sunlight. Sealing them in a bag with a desiccant pack protects against humidity, which is the most common cause of release problems on stored film.
None of this is complicated, but the details are where a shop either builds a reputation for reliable work or ends up redoing orders. Get your files right, follow the film manufacturer's pressing specs, store your stock sensibly, and price with waste in mind. The rest follows from doing the basics consistently.