
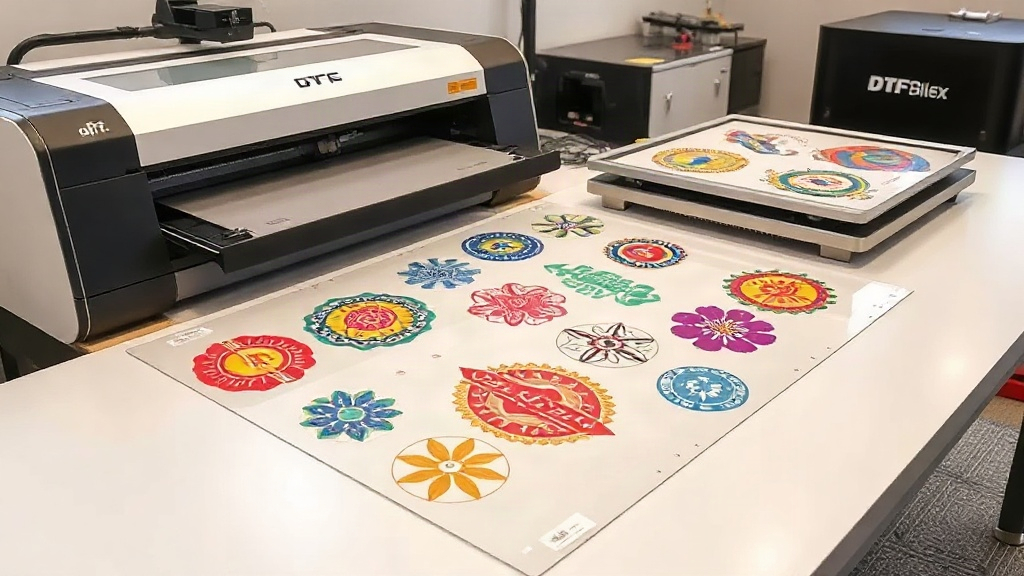
If you're into DTF printing, you've probably heard about gangsheets. But what exactly are they, and why should you care? In simple terms, a DTF gangsheet is a single sheet containing multiple designs arranged together for efficient printing. Instead of printing one design at a time, you gang them up on a larger sheet, saving time, money, and effort. Whether you're a small business owner or a hobbyist, mastering the art of the DTF gangsheet can transform your printing game. In this guide, we'll dive deep into everything you need to know about gangsheets, from creating them to using them like a pro.
What is a DTF Gangsheet?
A DTF gangsheet is essentially a compilation of multiple DTF transfers printed on a single sheet of film. The idea is to maximize the use of your printer's bed and transfer film, reducing waste and increasing throughput. Imagine you have several small designs that you need to print. Instead of printing each one separately, you arrange them on a larger canvas, leaving minimal space between them. This arrangement is your gangsheet. Once printed, you can cut out each design and apply it individually. The benefits are clear: you save on film, ink, and time. Plus, it's more eco-friendly because you're using fewer resources per design.
Why Use a DTF Gangsheet?
There are several compelling reasons to incorporate gangsheets into your DTF printing routine. Let's explore the main advantages.
Cost Efficiency
DTF printing consumables, especially transfer film and ink, can add up quickly. By gangsheeting, you use less film per design because you're not leaving large empty spaces. You also reduce ink waste by printing multiple designs in one pass. Over time, these savings can be significant, allowing you to offer more competitive prices or increase your profit margin.
Time Savings
Printing one design at a time means multiple setup, printing, and curing cycles. With a gangsheet, you print all designs at once, then cure them together. This streamlines your workflow, especially for batch orders or when you have many small jobs. You can also prepare gangsheets in advance and print them as needed, further speeding up production.
Consistency and Quality
When you print designs together on the same sheet, they go through the same printing and curing conditions. This consistency can lead to more uniform results, especially in terms of color vibrancy and transfer durability. Plus, you can adjust the layout to ensure even spacing and avoid edge issues.
How to Create a DTF Gangsheet
Creating a gangsheet might seem daunting at first, but with the right approach, it becomes second nature. Here's a step-by-step guide to help you get started.
Step 1: Gather Your Designs
Start by collecting all the designs you want to include. Make sure they are in a high-resolution format, preferably PNG with transparent backgrounds. Check that each design is sized correctly for its intended application. You might have a mix of sizes, from small logos to larger graphics.
Step 2: Choose Your Software
You can use graphic design software like Adobe Photoshop, Illustrator, or free alternatives like GIMP or Inkscape. Some DTF printer RIP software also includes gangsheet tools. The key is to have a canvas that matches the width of your transfer film (commonly 13, 17, or 24 inches) and a length that fits your printer's maximum print length.
Step 3: Arrange Your Designs
Place your designs on the canvas, leaving a small gap (about 0.1 to 0.2 inches) between them to allow for cutting. Rotate designs if needed to fit more efficiently. Aim to fill the sheet as much as possible without overlapping. Remember that DTF transfers require a white ink layer, so ensure your designs have proper white underbase if necessary. Most RIP software handles this automatically.
Step 4: Add Registration Marks (Optional)
If you plan to use a cutting machine, adding registration marks can help align the cuts. However, for manual cutting, you can skip this step. Some printers also require crop marks for alignment.
Step 5: Print and Cure
Once your gangsheet is ready, print it using your DTF printer. Follow your printer's settings for ink limits and white ink density. After printing, apply hot melt powder evenly, shake off excess, and cure using a heat press or oven according to your powder's specifications. Now your gangsheet is ready to use!
Best Practices for DTF Gangsheets
To get the most out of your gangsheets, keep these tips in mind.
- Plan your layout: Use software that allows nesting to minimize wasted space. Group similar sizes together.
- Mind the gaps: Leave enough space for cutting; too little can cause designs to bleed into each other.
- Test your settings: Before printing a full gangsheet, do a small test print to calibrate your printer and powder application.
- Store properly: Keep printed gangsheets in a cool, dry place away from direct sunlight to prevent premature curing or dust accumulation.
- Label your sheets: If you have multiple gangsheets, label them with the design names and date to avoid confusion.
Common Mistakes to Avoid
Even experienced printers can slip up. Watch out for these pitfalls.
- Overcrowding: Cramming too many designs can lead to cutting errors and ink smudging. Leave a little breathing room.
- Inconsistent white layer: Ensure your white ink settings are correct; otherwise, colors may appear dull on dark garments.
- Improper curing: Under-curing leads to washes out; over-curing can make the transfer brittle. Follow powder instructions precisely.
- Ignoring film orientation: Some films have a printable side; printing on the wrong side ruins the sheet.
Advanced Tips for Pros
Once you're comfortable with basic gangsheets, try these advanced techniques to elevate your game.
Use Nesting Software
Dedicated nesting software can automatically arrange your designs for optimal film usage. This is especially useful for complex shapes.
Create Themed Gangsheets
Group designs by theme, color, or size. For example, a gangsheet of sports logos or a sheet of small left-chest designs. This makes it easier to manage inventory and fulfill orders.
Experiment with Film Types
Different films have varying characteristics. Try matte, glossy, or specialty films to see what works best for your designs and customer preferences.
Frequently Asked Questions
What is the maximum size for a DTF gangsheet?
The maximum size depends on your printer's capabilities. Common DTF printers support film widths up to 24 inches, and print lengths can be several feet long. Check your printer's specifications for exact limits.
Can I reuse a DTF gangsheet?
No, DTF transfers are single-use. Once applied to a garment, the transfer cannot be reused. However, you can print multiple gangsheets in advance and store them for future use.
How do I prevent colors from fading after washing?
Ensure proper curing of the hot melt powder and follow washing instructions. Use cold water, turn the garment inside out, and avoid harsh detergents. Properly cured transfers can last 50+ washes.
Do I need a special printer for DTF gangsheets?
You need a DTF printer that uses DTF ink and film. Converted inkjet printers or dedicated DTF printers work. The key is using the correct ink and film combination.
How can I optimize my gangsheet for cost savings?
Use nesting software, group designs efficiently, and minimize empty space. Also, consider printing on larger film rolls to reduce per-unit cost. Regularly maintain your printer to avoid waste from misprints.
With these insights, you're well on your way to mastering DTF gangsheets. Remember, practice makes perfect, so start small and experiment. Happy printing!