
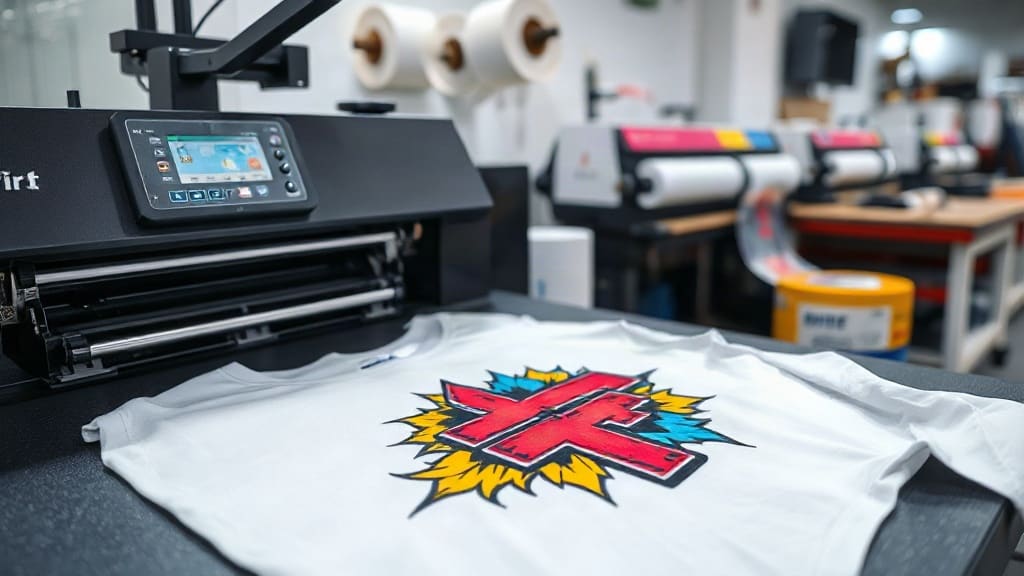
DTF transfers have become a buzzword in the custom printing industry, and for good reason. Whether you're a small business owner, a hobbyist, or someone looking to start a print-on-demand venture, understanding this technology can open up new possibilities. In this guide, I'll walk you through everything you need to know about DTF transfers, from what they are to how to use them effectively. I've spent countless hours experimenting with various printing methods, and DTF has genuinely impressed me with its versatility and ease of use.
So, what exactly are DTF transfers? DTF stands for Direct to Film. It's a printing method where a design is printed onto a special film, coated with adhesive powder, and then heat-pressed onto a garment or other surface. Unlike traditional screen printing or heat transfer vinyl, DTF allows for vibrant, detailed prints on a wide range of materials, including cotton, polyester, blends, and even leather. If you're curious about how it compares to other techniques, you're in the right place.
What Makes DTF Transfers Stand Out?
DTF transfers have gained popularity because they solve many problems associated with older methods. Here are some key advantages:
- Versatility: You can apply DTF transfers to almost any fabric, including dark and light colors, without needing a white underbase.
- Durability: The prints are stretchable and wash-resistant, making them ideal for everyday wear.
- Detail and Color: You get high-resolution prints with vibrant colors and fine details, even with gradients and complex designs.
- Cost-Effective: For small to medium runs, DTF transfers are more affordable than screen printing because there are no setup fees.
- Ease of Use: You don't need to separate colors or create screens; just print and press.
Compared to sublimation, which only works on polyester, or vinyl, which requires weeding, DTF offers a simpler and more flexible process. It's no wonder that many print shops are adding DTF to their services.
How to Use DTF Transfers: Step-by-Step
If you're ready to try DTF transfers, the process is straightforward. Here's a step-by-step guide based on my own experience:
- Print your design: Using a DTF printer, print the design onto a special PET film. The print should be mirrored if you're using a design with text.
- Apply adhesive powder: While the ink is still wet, sprinkle DTF adhesive powder over the printed area. Make sure you cover all the ink; this powder is what bonds the design to the fabric.
- Cure the powder: Shake off excess powder and then cure the film in an oven or with a heat press. This melts the powder, creating a sticky layer.
- Press the transfer: Place the film onto your garment with the design facing down. Use a heat press at around 160°C (320°F) for 15-20 seconds with medium pressure.
- Peel: After pressing, let it cool slightly, then peel off the film. You can do a hot peel or cold peel, but many prefer cold peel for better detail retention.
That's it! You have a custom printed garment. The whole process, from printing to pressing, can be done in under five minutes once you have the equipment set up.
Choosing the Right Equipment
To get started with DTF transfers, you'll need a few essential pieces of equipment:
- DTF Printer: You can convert a standard Epson or Ricoh printer with a DTF kit, or buy a dedicated DTF printer. Dedicated printers often come with white ink circulation systems, which are crucial for quality.
- Heat Press: A clamshell or swing-away heat press is necessary for applying the transfer. You'll need one that can reach at least 160°C.
- Shaker or Powder Applicator: This ensures even application of the adhesive powder.
- Curing Oven: While you can use a heat press to cure, a curing oven or powder melter speeds up the process and provides consistent results.
- Consumables: PET films, DTF ink (including white), and adhesive powder.
Investing in quality equipment is important. I started with a converted printer, but moving to a dedicated DTF printer reduced issues like clogging and color inconsistency.
Tips for Perfect DTF Transfers
Even though DTF transfers are user-friendly, there are some pitfalls to avoid. Here are my top tips:
- Use high-resolution images: For crisp prints, your source image should be at least 300 DPI.
- Calibrate your printer: Regularly clean and calibrate to ensure consistent color output.
- Test on scrap fabric: Before pressing your final garment, do a test to check alignment and color.
- Adjust pressure and time: Different fabrics may require different press settings. Start with the recommended parameters and adjust based on results.
- Let the transfer cool before peeling: While some films allow hot peel, cold peel often yields better detail, especially for small text.
- Store your films properly: Keep unused printed films in a cool, dry place to prevent the adhesive from degrading.
By following these tips, you'll minimize waste and produce professional-looking prints.
What Can You Make with DTF Transfers?
The applications are almost endless. You can create:
- Custom t-shirts and hoodies
- Sports jerseys and athletic wear
- Tote bags, caps, and other accessories
- Pet apparel
- Personalized gifts like mugs (though for mugs, you need a special press)
- Decorative items like throw pillows
Because DTF transfers work on a variety of materials, you can expand your product line without significant investment. Many entrepreneurs use DTF transfers to offer print-on-demand services without holding inventory.
DTF vs. Other Printing Methods
To truly understand the value of DTF transfers, it's helpful to compare them with other common methods:
DTF vs. Screen Printing
Screen printing is great for large orders with few colors, offering low per-unit costs. However, it requires significant setup, and each color needs a separate screen. For small orders or multi-color designs, DTF is more cost-effective and quicker.
DTF vs. Sublimation
Sublimation prints are permanent and don't crack, but they only work on polyester or polymer-coated surfaces. DTF works on cotton and blends, making it more versatile. If you're printing on white polyester, sublimation might be cheaper, but for dark or mixed fabrics, DTF wins.
DTF vs. Heat Transfer Vinyl
HTV is great for simple designs and one-off prints, but it requires weeding each piece, which is time-consuming. DTF handles full-color designs with gradients effortlessly, making it superior for complex artwork.
In my opinion, DTF strikes the best balance between quality, cost, and flexibility for most custom printing needs.
Common Challenges and Solutions
No method is perfect. Here are some common issues with DTF transfers and how to solve them:
- Adhesion problems: If the transfer peels off, you might not have applied enough powder or pressed with insufficient pressure. Increase pressure and ensure even powder coverage.
- Washing out: To prevent fading or cracking, use high-quality powder and ensure proper curing. Also, advise customers to wash garments inside out in cold water.
- Color mismatch: This often happens due to printer profile issues. Use ICC profiles specific to your ink and film combination.
- White ink clogging: If your printer has white ink, it tends to settle. Run a cleaning cycle regularly and agitate the ink bottles.
By troubleshooting these issues, you'll save time and money in the long run.
Frequently Asked Questions
Do DTF transfers work on dark shirts?
Yes, DTF transfers work beautifully on dark shirts because they include a white underbase in the print. This white layer ensures the colors pop, just like on light fabrics.
How many washes can a DTF transfer withstand?
With proper application, a DTF transfer can withstand 50 or more washes without cracking or fading. To maximize longevity, use a good quality adhesive powder and follow the recommended pressing parameters.
Can I use DTF transfers on non-fabric surfaces?
DTF transfers are primarily designed for fabrics, but they can also be applied to other surfaces like wood, ceramic, or metal if the surface can withstand the heat press temperature. However, durability may vary.
Do I need a special printer for DTF transfers?
Yes, you need a printer that can print white ink, which is essential for DTF. You can either purchase a dedicated DTF printer or convert an existing inkjet printer with a DTF conversion kit.
Is DTF printing expensive to start?
The initial investment can range from a few hundred dollars for a converted printer setup to several thousand for a professional dedicated system. However, the low running costs and versatility often make it worthwhile for small businesses.
Final Thoughts
DTF transfers have truly revolutionized the custom printing industry, making it accessible to everyone. After using various methods, I've found that DTF offers an unmatched combination of quality, ease, and affordability. Whether you're looking to start a side hustle or upgrade your existing print shop, I highly recommend giving DTF a try. With the right equipment and a bit of practice, you'll be producing stunning custom products in no time.
If you're ready to dive into DTF transfers, start with small projects to build your confidence. Experiment with different fabrics and designs, and soon you'll master this versatile printing method. The possibilities are limited only by your imagination.